Showing posts with label Snack. Show all posts

Friday, July 22, 2011

Miss CoCo's Cornflake Clusters

Jolie's playgroup was having a little party to celebrate Racial Harmony Day, so I thought I make something. The teacher wanted us to bring some traditional treats, but because I found out a little too late, I didn't have the time to prepare anything elaborate. If I knew earlier, I would have made some of my delicious pineapple tarts!

Anyway, no time, so I decided to make a modern CNY treat, cornflake clusters.


I've never made them before, so I did a little homework on the internet and improvised this recipe myself. Turned out a little too sweet, even for me! So I came out with this revised recipe.

60g Unsalted Butter
30g Caster sugar
60g Honey
220g Unsweetened Cereal
24g Raisins

  1. Bring the honey and butter to a boil over small fire. Let it boil for 3 -4 minutes while you prepare the rest.
  2. Pour the honey mixture into the cornflakes and raisins and mix well.
  3. Scoop into prepared mini cupcake cases. It's easier if you put the cases into the cupcake tins 1st, so that it will hold it's shape no matter how you shove the cornflakes in.
  4. Chill for several hours.


My original recipe was:

60g Unsalted Butter
60g Caster sugar
60g Honey
110g Banana Nut Crunch
24g Raisins

But like I said, it was way too sweet. Some pointers:
  • Banana Nut Crunch has a great mix of wholewheat cereal, granola, walnuts and dried banana, making it very nutritious. But it alone was already sweet, so it's not suitable for this recipe. Try something unsweetened to balance it out.
  • There was too much honey-sugar mixture versus the cereal. So the sugar coating was too thick, making it quite hard, like a candy. Adding more cornflakes would retain the crispy-ness of the cornflakes, held together by a little sweet syrup.


Other than that, it's a great party finger food, sweet and crispy. Perfect for kids party!

Wednesday, March 24, 2010

CoCo's Butter Cake


My baking mood was on, so I dug out an old cookbook and made a butter cake!

Baby was napping, so I didn't even use the electric mixer! Arms ended up all sore and tired, but biting into the warm buttery cake during teatime was worth all the effort!

The stupid recipe book indicated only 25 minutes of baking, but it ended up with raw batter in the middle! Argh! So here I indicated a longer baking time.

300g butter
300g icing sugar
1/2 teaspoon of baking powder
5 eggs (I only had 4 - still ok :D)
280g flour

1. Glaze oil and line baking tin with baking paper. Preheat oven at 180 degree Celsius.

2. Sieve flour and baking powder.

3. Beat half of the icing sugar and butter till light and fluffy.

4. Separate egg yolk and white. Beat egg white and other half of icing sugar till fluffy then add in egg yolks. Continue beating until creamy.

5. Using hand, blend butter mixture and egg mixture evenly, add in flour and mix well. Pour mixture into baking tin and bake for about 45 minutes.

6. Cool cake in pan for 5 mins before inverting it onto a wire mesh to be further cooled.

Serve with a cup of hot tea or coffee! YUMZ~!

Wednesday, February 17, 2010

Pan Fried Nian Gao


This is another traditional dish that is served during Chinese New Year. You can check out the meaning and other details here, Nian Gao!


For me, this is a dish that makes chinese new year morning special. Mum would make these for breakfast and we'll eat the sticky, delicious, sweet cakes while watching tv.

I've been eating these for years, but this is the very first time I'm making them myself. Thankfully, with my Mum's instructions, they tasted very close to how my Mum makes them.

It's really simple to make, the only problem was cutting the sticky, gooey, 'gao'. I guess you can try dipping your knife in oil, or hot water, or freeze the nian gao 1st.

When you have cut them into squares, make the batter. It's quite like making tempura batter. It's best to use self raising flour, but if you don't have it, mix plain flour with a little baking powder.

So, just mix flour, egg with a little cold water to get a thick batter. Coat the nian gao and pan fry it with a little oil in medium heat. Before turning over, put a little batter on top to get an even coat on both sides. When the gao is nice and golden brown, it's ready!

Saturday, December 12, 2009

CoCo's Best Brownies


OK I've been having crazy cravings for brownies for months! But it's never easy to bake when you have a clingy 10 month old baby that always demand your attention. So I found a recipe at HERSHEY'S, took another week to gather my ingredients, and finally got down to do it!

Brownies are actually quite easy and quick to prepare, but it was a stressful 30mins with baby screaming at my background. The results? ABSOLUTELY 100% WORTH IT! Definitely a MUST TRY!

Basically I followed HERSHEY'S recipe, but they really like it SUPER SWEET, so I reduced the sugar by 1/4 cup. Trust me, it's sweet enough.

• 1 cup (2 sticks) butter or margarine (about 226 grams)
• 1 and 3/4 cups sugar
• 2 teaspoons vanilla extract
• 4 eggs
• 3/4 cup HERSHEY'S Cocoa or HERSHEY'S SPECIAL DARK Cocoa
• 1 cup all-purpose flour
• 1/2 teaspoon baking powder
• 1/4 teaspoon salt (I use salted butter, so I didn't add salt)
• 1 cup chopped nuts(I added walnuts, pecan or other 'soft' nuts will be fine)

Directions:
1. Heat oven to 350°F / 176°C Grease 13x9x2-inch baking pan.

(I laid 2 pieces of aluminium foil in a criss cross way on the pan, so when it's cooled, I just lift the whole thing up, place it on the chopping board and cut it. Easy and clean.)

2. Place butter in large microwave-safe bowl. Microwave at MEDIUM (50%) 2 to 2-1/2 minutes or until melted. Stir in sugar and vanilla. Add eggs, one at a time, beating well with spoon after each addition. Add cocoa; beat until well blended. Add flour, baking powder and salt; beat well. Stir in nuts, if desired. Pour batter into prepared pan.

3. Bake 30 to 35 minutes or until brownies begin to pull away from sides of pan. Cool completely in pan on wire rack. Frost if desired. Cut into bars. About 36 brownies.
(Duh~ how tiny is their brownie slices? I only got 12 cause I cut them pretty big. Haha~)

Really very good. No joke! You can store them in the fridge. When you need a little brownie therapy, pop one into the microwave for about 40 seconds and serve with a big scoop of ice cream! Instant happiness!

Sunday, November 8, 2009

Fruit Paradise - Fruit Tart Shop

Located at Orchard Central, this shop sells, well, Fruit Tarts! We accidentally came across the shop while shopping and we were captivated by how pretty the tarts look in the fridge! It looked SO pretty, we wondered if they were even real! After staring at them for awhile, we were amazed that they are REAL... So we went in and tried them out!


I tell you, it was almost impossible to choose which one to order! Even after ordering, I was tempted to pull the waitress back to change my mind. But I stuck to my decision and got the Banana Caramel Tart.


It's a custard cream base tart with bananas and almond flakes, drizzled with caramel sauce.

My Hubby got the Blueberry Tart, which is the fresh cream base tart with blueberries and blueberry jelly cubes.


They look very rich, creamy and deadly. But surprisingly, they taste quite light. Personally, I would prefer it to be sweeter, but I guess many people are health conscious. Overall, it was a nice tea break. The tart was nice, the tea was a perfect complement to the tarts, the service was excellent and the prices was reasonable. My only complaint was that my tea was not hot enough. What a kill joy... -_-

Check them out

Tuesday, January 20, 2009

Jam Drops


I got this recipe from Donna Hay - Modern Classics Book 2. I was a little bored one evening, so I wanted to do something simple, fuss free. This is a sweet, buttery and crumbly cookie with jam in the middle. Very easy to do, and a nice snack to nibble on. :)

180g butter, softened
1 cup caster (superfine) sugar
1 egg
2 cups plain flour, sifted
1/2 teaspoon baking powder
Jam of your choice (I use rasberry)

1. Preheat the oven to 180°C.

2. Beat butter and sugar with electric mixer till its light and creamy.

3. Add egg and mix well.

4. Stir through the flour and baking powder and mix into a dough.

5. Roll into small balls with about 3cm in diameter. Place onto baking tray with non-stick baking paper, allowing room for the biscuits to spread a little during baking.

6. Flatten the dough slightly and make a little indent in the middle of the dough. Fill the hole with jam.

7. Bake for 10minutes or until golden brown.

8. Cool on wire racks.

Wednesday, January 7, 2009

Dad’s Pineapple Tarts


There’s 2 ways to make pineapple tarts. One way was to blend everything up using the mixer, and the other is the rubbing in method. Dad gave me this rubbing in method recipe for a more fluffy tart; basically you rub flour and chilled butter with your fingers to get a breadcrumb-like texture.

But if you have warm hands like me, you would probably end up with a overly wet dough due to the butter melting from the warmth of your hands. If that’s the case, you can use a pastry blender to cut the chilled butter into the flour. Works for me!


Warning! This dough is much more difficult to work with as it is SO SOFT!
Key points to remember:
1. Minimum hand contact – work quickly! The more you handle the dough, the softer it gets!
2. Dust! – Make sure your table, rolling pin and cookie cutter is well dusted with flour.
3. Plastic sheet – Cut out a clean plastic bag into a sheet and put it over your dough when you roll it, this would prevent the dough from sticking onto your rolling pin.

Tart pastry:
300g cake flour (sifted)
220g butter (cubed and chilled)
100g sugar
15g custard powder
1 egg yolk
Ice water

Method:
1. Roll pineapple jams into little balls and set aside.

2. Preheat oven at 180°C.

3. Mix the flour, sugar and custard powder together.

4. Using a pastry cutter, cut the chilled butter into the flour till it resembles breadcrumbs.

5. Mix in the egg yolk and gradually add in the iced water till the mixture forms a soft dough.

6. Cover up the dough and chill in the fridge for about 2 hours.

7. Dust the work area with flour before rolling out the dough till it's about 0.7 cm thick.

8. Dust the pineapple tart mould with flour and cut flour into shapes.

9. Brush sides of tarts with egg wash.

10. Bake in a greased, lined baking tin for 10 minutes.

11. Remove tarts from the oven. Fill centre of tarts with the pineapple jam balls.

12. Return tarts to oven to bake for a further 5 minutes, or until golden brown.

13. Cool the tarts on wire rack.

Monday, January 5, 2009

Pineapple Tarts


With the Chinese New Year coming, pineapple tarts are a MUST-HAVEs in every Chinese family. Being my favourite festive goodie ever, I never fail to buy some every year. This year, I've decided to take on the challange and learn how to make my favourite pineapple tart!

I got this recipe from Jo's Deli & Bakery, but I’ve reduced the quantity by half. As this is my virgin attempt in making pineapple tarts, I’ve decided to go easy on myself and use store bought pineapple jam for my tarts. :) (I bought from Phoon Huat)

Tart pastry:
150g butter
65g margarine
50g icing sugar
40g milk powder
½ egg
300g cake flour
15g custard powder

Method:
1. Roll pineapple jams into little balls and set aside.

2. Preheat oven at 180°C.

3. Cream butter and margarine in a large mixing bowl until light and fluffy.

4. Add egg and beat well.

5. Sift icing sugar, milk powder, flour and custard powder into the mixture. Fold to incorporate all ingredients to form a smooth pastry dough.

6. To make it easier to handle, wrap up the dough with cling wrap and let it chill in the fridge for a few hours.

7. Dust the work area with flour before rolling out the dough till it's about 0.7 cm thick.

8. Dust the pineapple tart mould with flour and cut flour into shapes.

9. Brush sides of tarts with egg wash.

10. Bake in a greased, lined baking tin for 10 minutes.

11. Remove tarts from the oven. Fill centre of tarts with the pineapple jam balls.

12. Return tarts to oven to bake for a further 10 minutes, or until golden brown.

13. Cool the tarts on wire rack.


Takes abit of effort, but it makes a great gift!

Monday, December 29, 2008

Mama’s Radish Cake (萝卜糕)


I always believe that following the recipe book to the dot does not guarantee success. A perfect example is my Mom's 萝卜糕. The original recipe is from a cook book she read many years ago, (Delightful snacks and dim sum by Agnes Chang) but she only succeeded in making it super delicious after MANY failed attempts and MANY adjustments to the recipe.

Recently I've documented down her own revised version and now I'm sharing it with everybody, so we don't have to go through the painful trial and error process. Heehee...Thanks Mummy!


600g White Radish
300g Rice Flour
75g Tapioca Flour
2 cloves of garlic, finely chopped
4 cups of cool water
1 cup of warm water
Salt and Pepper

Optional Items
Chinese waxed sausages
Dried Shrimps
Mushrooms

Preparation!

Radish
Grate the radish coarsely and set aside.


Rice Flour Batter
Mix rice four, tapioca flour, ½ a teaspoon of salt and pepper with 4 cups of cool water. Mix well and set aside.

Optional Items
- Chinese waxed sausages: Soak sausages in boiling hot water for 5mins. Drain and chop into small pieces.
- Dried Shrimps: Soak in water for a few minutes, drain and set aside.
- Mushrooms: Chop into small pieces.

1. With a little oil, stir-fry the garlic with the grated radish

2. Add 1½ teaspoons of sugar into radish mix and stir fry in high heat till radish becomes slightly soften.

3. Add 1 cup of warm water.

4. Add in optional items, cover up the frying pan and cook in low heat until radish becomes soft and slightly yellowish.

5. Mix the rice flour batter well and pour into radish mix through a sieve.


6. Add salt, pepper and a little msg before stirring the mixture.

7. Continuously stir the mixture in one direction until it forms into a thick ball of dough.


8. Scoop into an oiled tin and smoothen it out.


9. Steam for 35 to 40 minutes or until chopstick inserted in center comes out clean.

There's so many ways to enjoy this dish!
1. Steamed: Slice it up and serve it with a little soya sauce or chilli
2. Pan-Fried: After it's cooled, slice it into small pieces and pan-fry it till it's a little golden brown.
3. Stir-Fried: Chop it up into small pieces and stir-fry it up with dark soya sauce, chilli and garlic. Hawker style!

The cake can be kept in the fridge after it is cooled. Try not to keep for more than 1 week.

Wednesday, December 10, 2008

Loong Fatt Tau Sar Piah


We were around the area this afternoon, so we stopped by the store at Balestier and bought some yummy tau sar piah, or bean pastries.

Balestier road is well known for the several tau sar piah stores. The story that I heard was that it started with just one store, opened by the master yoda of tau sar piahs. Then, the apprentices learnt how to make the beautiful pastries from the master and left the nest to open their own stores all over Balestier! Ingrates...

Anyway, it's super easy to spot the original master store. Located right at the end of Balestier Road, the very first store, is the store that looked like time stood still. The store looks quiet and sleepy from the outside, but walk into the store and you'll find a whole army of aunties, rolling trays and trays of dough and wrapping bean paste into them.


You can even enjoy the pastries, fresh out of the oven, with a nice cup of coffee at the store, which is super vintage with the marble table tops and wooden chairs.

The tau sar piahs come in either sweet or salty versions. 60 cents each... Super fluffy! I also like it that they do not wrap too much dough around the bean paste. Very light and great for tea break! :D


Loong Fatt Eating House & Confectionary
639 Balestier Road
Tel: 6253 4584

Opens:
Mon-Sat & PH: 8am - 4.30pm(Closed on Sundays)

Thursday, November 13, 2008

Instant Pizza Toast


A friend from Hong Kong taught me this, and I just love her for it! This is a perfect little snack or breakfast on days where you just want something a little extra, something other than your boring peanut butter sandwich. And it's SO easy to do!

All you need is: Pasta sauce, Cheese and Bread


I like to use shredded mozzarella because it's nice and stringy, like pizza! But if you don't have those in hand, you can always use those Kraft square cheese slices.

Just spread some pasta sauce onto your bread, sprinkle cheese onto it and throw it into a toaster till the cheese has melted into a gorgeous, divine, lava-like goo with slightly browned tips.


Instant Pizza Toast! Couldn't be more simple than that!

Tuesday, October 7, 2008

CoCo's Tempura Vegetables

We had vegetable tempura recently at a Japanese restaurant, so today I was suddenly inspired to make some myself for lunch!

This is a great and simple dish for parties and also great when you want to clear out the left over vegetables in your fridge. Besides, it's easy to make and delicious even by itself!!! Whoo Hoo!

All you need is:
vegetables - Shredded
plain flour
an egg
very cold water

You can choose what type of vegetables you want. I used sweet potato, carrots, golden mushrooms, capsicum, onions and bak choy.


For the batter, I mix an egg with a cup of very cold water. Then I mix in the flour until the batter is nice and thick - like a pancake batter.
*It's ok to have lumps in your batter - they are nice and crispy!

All that's left to do is to fry them! Coat a small mixture of vegetables in the batter and fry them in a small pot of hot oil till they are nice and golden brown.


While they were hot, sprinkle A LITTLE salt on the vege cakes and serve!The vege cakes are delicious by itself, but we happened to have some soba sauce in the fridge and it goes perfectly well with it too!

Enjoy!

Saturday, June 28, 2008

PODS

Feeling peckish? Have a craving for something sweet? Or do you just have a sweet tooth? Try this out.


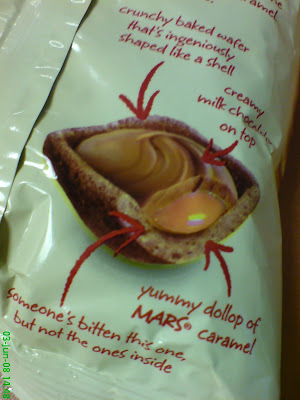
The first thing I love about PODS is their packaging. The way they describe it is so funny.


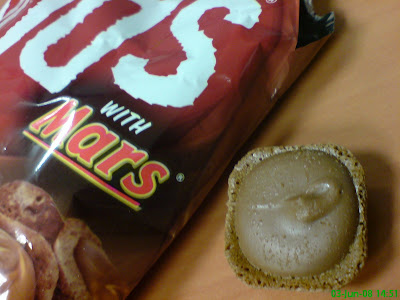
Fantastic afternoon snack to go with a cuppa tea. Crunchy biscuit on the outside, soft caramel on the inside, covered by a smooth chocolate top. Sweet...


It comes in Snickers and Twigs too. Even though I'm a great fan of the Snickers bar, PODs Mars is the best. :)

Wednesday, June 25, 2008

ABC Popiah

When ever Cobby and I are having Kuay Chap dinner at Toa Payoh, we'll always share one of our favourite popiahs. This store has been here since the 70s? Maybe longer.


The stewed turnip is very nice and flavourful with a good texture. I especially love the slight hint of fresh mince garlic smeared onto the popiah skin, along with their firery chilli paste. I also love the crispy bits inside, what is it? I think its peanuts. Wrap up all the goodies with their handmade popiah skin, 1 roll is usually not enough. YUM~!


Oh if you're feeling adventurous you can even buy the popiah skins from the boss and make popiahs at home! :)

ABC Popiah
#01-204
Blk 93 Lor 4 Toa Payoh
S310093
Time: 1000 - 2200, Off on Mon
Owner: Mr. Tay
Outlet: 62561737

Tuesday, May 27, 2008

Homestyle Two-Bite Brownies

Are you a brownie fan? Or maybe just a chocolate lover?

Then you will love these. I found this selling at the NUS Coop store a few months ago this have since been pushed to my number one spot for BEST SNACK IN A BAG!


Like the name suggest, they are little brownies that can be finished off in two bites. For some packaged dessert, these brownies are surprisingly delicious!!!

They are soft, moist and oh so chocolately. I swear you can never stop at one! Goes superbly with a nice hot cuppa tea!

Chocolat N' Spice Muffins

My FAVOURITE place for a muffin is the undefeated Chocolat N' Spice. I've been patronising the store for years. My previous office is just next to it, so naturally we were frequent customers. But surprisingly, fanatics can be found even at the Clementi area, my current office.


We always buy in BOXFULS... there are so many different flavours! Orange, cheese, chocolate chip, banana, walnut, blueberry, etc.etc.


But my ultimate favourite is this beauty... Double Chocolate


So chocolately and more importantly, SO SOFT AND MOIST! See the chocolate chips inside!


Go try it - You won't regret it!

Chocolat N' Spice
Blk 1 Tanjong Pagar Road
#01-18 Tanjong Pagar Plaza
Singapore 082001
Tel: (65) 9276 2110

Opening hours
Mon to Fri: 8.30 am to 5 pm
Sat: 8.30 am to 3 pm
Closed: Sundays & public holidays

Sunday, May 25, 2008

Poh Guan Cake House's Chinese Bean Pastries (豆沙饼)

Poh Guan Cake House, (opposite Hong Lim Food Centre) is the old fashion type of old shop that specialise in making traditional chinese pastries and kuehs and makes everything fresh. My Hubby & I love those chinese bean pastries (豆沙饼)and it's so hard to find shops that make really good ones anymore!! So naturally we bought a whole box when we found this rare gem.

Just as expected, it was great. Flaky but not dry, the bean paste is just nice, not too sweet. Sigh, really good leh. Really, believe me. I'm very picky with my pastry. It's good.

Poh Guan Cake House's Onde Onde

There's an old fashion pastry shop opposite Hong Lim food centre, Poh Guan Cake House. This is the type of old shop that specialise in making traditional chinese pastries and kuehs and makes everything fresh. If you're there, ask for their Onde Onde. They only make a few packets a day so you have to be early!

ONDE ONDE!!!!

I tell you. IT. WAS. SO. GOOD.

Real onde onde is filled with good quality gula melaka. Some people mix the gual melaka with coconut. I don't get it. What for?! Anyway, Poh Guan's Onde Onde was so heavenly.

Tip on eating Onde Onde: Pop the whole thing into your mouth and feel the gula melaka squirt out inside your mouth when your teeth sink into the soft yummy kueh.

GOD!!! The whole box was gone before the car left the carpark. Hahaha... Impossible to stop. I will be back for more.

Wednesday, April 9, 2008

CoCo's Chocolate Chip Muffins

I was inspired to make some muffins after watching this pathetic woman trying to sell muffins in a variety show on channel 8. This woman hates muffins, and yet she opens a stall selling muffins! Not surprisingly, she sucked and so needs help from professionals to save her business.

ANYWAY, carry-on... let's not waste precious brain cells on imbeciles. Like I said, I was inspired to make some muffins. So I found this chocolate chip muffin recipe on Nigella.com. Usually I would not blog down recipes that didn't turn out well, so I guess this one made it. Haha..

Verdict: Very easy, very quick, very delicious. I complete everything (plus cleaning up) within an hour! Try it, it's fool-proof!

250g plain flour
2 teaspoons baking powder
Half-teaspoon bicarbonate soda
2 tablespoons best quality cocoa
175g caster sugar
150g chocolate chips (plus more for sprinkling later)
250ml milk
90ml vegetable oil
1 large egg
1 teaspoon real vanilla extract

1. Preheat the oven to 200C and fill a 12-bun muffin tray with paper cases.

2. Weigh out the dry ingredients into a large bowl. Pour all the liquid ingredients into a measuring jug (Why jug? Bowl also can lah~).

3. Mix both together (DO NOT over-do it. Just mix it up and leave it) – it will be a runny batter - then spoon into waiting muffin cases.

4. Sprinkle more chocolate chips on top then cook for 20 minutes or until the muffins are risen and springy.

Makes 12
SIMPLE RIGHT??!!

Result:

Wednesday, March 26, 2008

CoCo's Cheesey Butter Prawns

What do you do when you have 4 pieces of prawns left? You make a nice little side dish to go with your meal! To save on washing another dish, I made a little tray with aluminium foil and placed the freshly shelled prawns in.

Sprinkle a little salt, sugar, pepper and paprika
Add a few little knobs of butter
Cover the prawns with shredded mozeralla cheese

Pop them into a pre-heated oven of 200 degrees for 10mins, or when the cheese has turned into a nice shade of golden brown.

Super delicious cheesey butter prawns ready to be devoured! Serve them while they are hot!

Related Posts Plugin for WordPress, Blogger...