Showing posts with label Chocolate. Show all posts

Monday, August 8, 2011

National Day Cake 2011

Happy National Day! My daughter, Jolie, was having a little celebratory party in her playgroup, so I thought I make a National Day cake!


Nothing new, I just used back the recipe from her birthday. But instead of chocolate buttercream, I made vanilla buttercream by opting out the cocoa powder and added 1 tablespoon of vanilla extract. I wanted to make a flag design, so I needed a white background.


I have this design in my head, but I didn't realise how difficult it was to make the stars and crescent moon until I actually started doing it. The stars were very small, so it was really hard to make the pointed ends of the stars. So I used a little buttercream to make an outline of the stars and crescent moon 1st before filling up the top of the flag with piping jelly mixed with a few drops of red food colouring.

It's not pretty, give me a break, it's my 1st time ever...

I tell you, I have a new found respect for bakers and their piping skills. Phew! I'm not a fan of food colouring, so if I wanted a really red background, either I have to put LOTS of colouring into the white cream (eww...) or just 2-3 drops into the piping jelly. I bought this piping jelly - neutral, from phoon huat. It's clear, so you have put any colour you want in it. It has a slight sourish flavour to it, but other than that, it's pretty alright.


If you look closer, I also bought little pink heart shaped sprinkles and added it to the sides. They looked so sweet! My cake is literally full of 'love'! Haha... *^,^*


I made a little mistake. I put the buttercream into the fridge after I made them (I don't know why) instead of using them immediately, so it turned a little stiff and I had a hard time spreading them onto the cake. I must have pressed the cake a little too much and it squished the cake a little. Also, I think I was a little heavy handed on the cream, so I felt that it may have turned off some of my "customers" at the party. But overall, I was very happy watching others enjoy my humble creation. All the hard work paid off. Promise that next year it would be even better!

Wanna read about the party? Click here!

Friday, June 3, 2011

内在美 Chocolate Mud Cupcakes


I made this for a friend's birthday. Kind of lazy to bake a cake, so I thought it would be better to bring chocolate cupcakes instead. This recipe was adapted from Baking Library. The original wasn't supposed to look so... ugly. I think either my oven was too hot or the cups were filled too full.

Anyway, it was the flavour that matters, thus the name, 内在美, which means "inner beauty". Haha... It's either that or my second choice, which was PMS chocolate mud cupcakes, because they were the perfect for dark and gloomy days when you have PMS...


Anyways, here are the ingredients:
30g cocoa powder
120ml boiling hot water
110g dark chocolate, melted and cooled (I used 63%)
110g unsalted butter, melted and cooled
165g brown sugar
100g ground almond
80g egg yolks (thats about 4-5 eggs, depending on size)
120g egg whites

  1. Line muffin tin with cupcake liners and preheat the oven at 175 degrees C.
  2. In a large mixing bowl, combine the hot water and the cocoa powder. Stir well to remove the lumps and ensure cocoa is well dissolved. Next, add in melted chocolate, melted butter, brown sugar and ground almonds. Stir to obtain an evenly mixed mixture.
  3. Beat in egg yolks on medium low speed, one at a time, ensuring each egg yolk is well combined before adding the next.
  4. In a separate clean metal bowl, beat egg whites on low speed until it turns foamy. Gradually increase the speed to medium high when the volume increases. Continue to beat the egg whites until they form medium-firm peaks. This is when the beaters are lifted from the egg whites, snowy egg white peaks are formed and they are slightly wobbly when the bowl is shaken.
  5. Fold one third of beaten egg whites gently into egg-yolk batter to lighten. Incorporate the remaining egg whites and fold gently to obtain a smooth, watery-foamy batter. Scrape sides and bottom of bowl to ensure even mixing.
  6. Spoon batter into cupcake liners until they are nearly filled. The batter will not rise much. Bake cupcakes at 175 degrees C for about 30 minutes or until an inserted toothpick comes out clean. Cupcakes will sink noticeably in the middle when cooled.

Since they were for a birthday, I made it more pretty by dusting some icing sugar on top.


Then I piled it up and made it a cupcake tower!


My friends loved it! It was awesome, and it was clean and easy to eat. Happy Birthday PL!

Tuesday, May 31, 2011

Self-Saucing Baked Chocolate Pudding


Hubby saw this recipe on the Sunday newspaper and asked me of I can make it. That's a pretty rare situation because, as ironic as it sounds, my Hubby does not have a sweet tooth. Yup, all my friends and family would be so excited to taste my creations, but not him. Since it's such a rarity, of course I jumped into the opportunity. Besides, dinner was sort of a failure as the steamed fish was screwed up. I needed to do something to repair my ego!

Thankfully, I just happened to have everything I needed. Fate has meant for me to make this pudding tonight!

(Serves 4-6)
100g Butter
100g Dark cooking chocolate
1 egg
200g Plain flour
1 1/2 tsp Baking powder
100g Caster sugar
1/2 tsp salt
100ml Milk

Sauce
100g white or brown sugar
2 Tbsp Cocoa powder
350ml Cold water

  1. Preheat oven to 170 degrees Celsius.
  2. Melt the butter and chocolate on a heat proof bowl over a pot of boiling water. Set it aside.
  3. Beat the egg in a small bowl and set aside.
  4. Sift together the flour, baking powder, sugar and salt into a large bowl. Add in the milk, the chocolate and butter mixture and the beaten egg, then mix together. The mixture should be thick and creamy.
  5. Lightly grease a deep oven dish and pour the mixture into it. I used a non-stick loaf tin, so I skipped the greasing.
  6. Mix the sugar and cocoa powder together and sprinkle over the mixture.
  7. Pour cold water over the top. It may look disastrous, but don't worry, it will sort itself out while it bakes.
  8. Bake in oven for about 40minutes. Because my black loaf tin heats up faster and retain heat more effectively, I cut the baking time by 8minutes.


The pudding was delicious! So moist and chocolaty, such a great comfort food for a Monday night. I think it would be even better served with a dollop of cream or ice cream, but I was just a little lazy and guilty. Besides, the pudding is self-saucing!

Saturday, January 29, 2011

Miss CoCo's Chocolate Buttercream Birthday Cake

I got this fabulous chocolate buttercream sponge cake from Baking Library and it was GREAT! Definitely a must-try for anyone who loves a good chocolate cake with rich chocolate frosting and yet, not too sweet or heavy.


As it was my very 1st attempt in making an actual birthday cake, and it was for my darling baby girl's birthday party, I wanted to give the recipe a try 1st. So I made one earlier half the size.

I even tried doing some simple piping with the extra buttercream. Haha...


I noticed that if it's too small, the sponge cake have trouble holding up at the sides while cooling. But I just wanted to try out the taste, and it was definitely a PASS for me!

So this is the full size portion...

Chocolate Sponge Cake :
70g egg yolks, room temperature
50g caster sugar
4 tbs vegetable oil
4 tbs water
80g cake flour
15g cocoa powder
1/2 tsp baking powder
145g egg whites, room temperature
50g caster sugar

Swiss Meringue Chocolate Buttercream: (about 840g)
195g egg whites
220g caster sugar
385g unsalted butter, softened but still cold
100g cocoa powder (I used Hershey's)

Making the Chocolate Sponge Cake:
  1. Preheat oven to 160 degrees C.
  2. Whisk sifted flour, sifted cocoa powder and sifted baking powder in a large bowl to combine.
  3. Place egg yolks, 50g caster sugar, oil and water in a large bowl. Mix well with a wire whisk untill the mixture is evenly mixed. Add the flour mixture in and whisk to obtain a smooth and thick chocolatey batter.
  4. Next, whisk egg whites on low speed. Increase speed slowly to medium-high and beat untill egg whites are at soft peaks. Add 50g of sugar gradually and beat untill egg whites are just stiff and still moist. This is when the beaters are lifted, the egg whites will form peaks that are upright and not drooping slightly. Egg whites will resemble whipped cream.The entire bowl of whites will not drop out when the bowl is overturned. Do not beat until the egg whites are dry and clumpy.
  5. Fold one third of beaten egg whites into egg yolk batter gently to lighten and combine. Fold in the rest of the beaten whites to combine. Final batter should be foamy and uniform in colour with no streaks of egg white present.
  6. Pour batter into 2 greased and lined 8 x 3 inch round pans and bake at 160 degrees C for 25 -35 minutes. Test doneness using a skewer or toothpick. The highest part of the cake should rise up to 4/5 or nearly the full height of the tin. When the cake is done, the inserted skewer will come out clean.
  7. Leave the cake to cool in the tin for a short while. Cake will shrink from edges on cooling. (happens everything, it is normal) When the cake is no longer shrinking, unmould from pan, remove parchment/baking paper and turn the cake out to cool.

Preparing the Swiss Meringue Chocolate Buttercream:

  1. Place 195 egg whites and 220g granulated sugar in a heatproof bowl. Sit the heatproof bowl on a saucepan filled with water. The base of the bowl should not be in contact with the water. This is known as a double boiler. Bring the water in the saucepan to a slight simmer. Use a balloon whisk and stir the egg whites and sugar constantly until the sugar has fully dissolved and the mixture is warm to the touch (test by inserting your finger).
  2. Remove the heatproof bowl and beat the warm egg white mixture on medium high speed to obtain stiff peaks using an electric beater. (It takes a longer time when sugar is added.) At stiff peaks, the beaten egg whites will not budge when bowl is overturned. When the beaters are lifted from the beaten egg whites, the surface of the egg whites should form stiff upright peaks (not drooping peaks). The beaten egg whites should be cool to the touch (room temperature), not warm like when it was removed from the saucepan.
  3. Beat in 385g butter into the beaten egg whites in 3 batches, ensuring each batch is incorporated before adding the next. The egg whites will deflate furiously when butter is added. Continue beating until the mixture is creamy and fluffy (Initially when the butter is added, the mixture may become watery. As more butter is added, the buttercream thickens up).
  4. Lastly, sift in 100g cocoa powder and continue beating to obtain a smooth chocolate buttercream.


Assembly:
  • I just sandwich some buttercream between the 2 sponge cakes and frost the whole cake with buttercream.
  • My hubby suggested adding some nuts to the cake, so I added some crushed hazelnuts to the side. The nuts really complement the chocolate very well!
  • I wanted to add some colour to the cake, so I topped it with some sweet Korean strawberries.
  • I wanted it to be more kiddy, so the train candle holder I found at Phoon Huat was perfect. :)


I was so busy bringing out the cake that I forgot to take a good photo of my greatest creation! Too bad, I just too 2 pictures hastily and did some cropping from the group photos. :P


So happy and proud... :))

Saturday, December 12, 2009

CoCo's Best Brownies


OK I've been having crazy cravings for brownies for months! But it's never easy to bake when you have a clingy 10 month old baby that always demand your attention. So I found a recipe at HERSHEY'S, took another week to gather my ingredients, and finally got down to do it!

Brownies are actually quite easy and quick to prepare, but it was a stressful 30mins with baby screaming at my background. The results? ABSOLUTELY 100% WORTH IT! Definitely a MUST TRY!

Basically I followed HERSHEY'S recipe, but they really like it SUPER SWEET, so I reduced the sugar by 1/4 cup. Trust me, it's sweet enough.

• 1 cup (2 sticks) butter or margarine (about 226 grams)
• 1 and 3/4 cups sugar
• 2 teaspoons vanilla extract
• 4 eggs
• 3/4 cup HERSHEY'S Cocoa or HERSHEY'S SPECIAL DARK Cocoa
• 1 cup all-purpose flour
• 1/2 teaspoon baking powder
• 1/4 teaspoon salt (I use salted butter, so I didn't add salt)
• 1 cup chopped nuts(I added walnuts, pecan or other 'soft' nuts will be fine)

Directions:
1. Heat oven to 350°F / 176°C Grease 13x9x2-inch baking pan.

(I laid 2 pieces of aluminium foil in a criss cross way on the pan, so when it's cooled, I just lift the whole thing up, place it on the chopping board and cut it. Easy and clean.)

2. Place butter in large microwave-safe bowl. Microwave at MEDIUM (50%) 2 to 2-1/2 minutes or until melted. Stir in sugar and vanilla. Add eggs, one at a time, beating well with spoon after each addition. Add cocoa; beat until well blended. Add flour, baking powder and salt; beat well. Stir in nuts, if desired. Pour batter into prepared pan.

3. Bake 30 to 35 minutes or until brownies begin to pull away from sides of pan. Cool completely in pan on wire rack. Frost if desired. Cut into bars. About 36 brownies.
(Duh~ how tiny is their brownie slices? I only got 12 cause I cut them pretty big. Haha~)

Really very good. No joke! You can store them in the fridge. When you need a little brownie therapy, pop one into the microwave for about 40 seconds and serve with a big scoop of ice cream! Instant happiness!

Tuesday, November 18, 2008

Chocolate Madness Muffins


I remembered ever making a mean batch of double chocolate muffins but I can't seem to find it in this blog! After searching around my other blog, I found it! The original recipe comes from my favourite cook book, Donna Hay, Simple Essentials: Chocolate.

The original name was Milk Chocolate Chunk Muffins, and uses 1 cup of chopped milk chocolate. But I've only got chocolate chips in my fridge, so I added 1 whole cup of chocolate chips into the muffin mix! Haha... A little overkill, but my friends absolutely loved how chocolatety the muffins turned out!

2 cups self raising flour, sifted
1/3 cup cocoa powder, sifted
1 teaspoon baking powder
1 cup caster sugar
2 eggs
1 teaspoon vanilla extract
2/3 cup vegetable oil
1/2 cup milk
1 cup unsweetened chocolate chips

1. Preheat oven to 180 degrees celcius
2. Mix flour, cocoa powder, baking powder & sugar
3. In seperate bowl; mix eggs, vanilla, oil & milk
4. Mix wet mixture to the dry mixture
5. Fold the chocolate chips into the mixture
6. Spoon mixtures into muffin tins lined with paper cups
7. Bake for 20mins or until cooked when tested with a skewer

Serve with a hot cup of coffee!

Saturday, November 8, 2008

Double Chocolate Layer Cake


This is my very first attempt in making a layer cake! I got the recipe from Nigella.com. The original serves 8-10 persons, using a 20cm cake tin. I cut all the ingredients by half and used a 12cm cake tin, so the cake is much smaller.

I made the cake yesterday evening, but I couldn't eat it as it would spoil my dinner! Agony! So I only got to try it a few minutes ago and I must say...

SO GOOD...

VERY chocolately, so it's perfect for those chocolate craving moments! I only spread a very thin layer of frosting so as not to make it too sweet, and I was right. The chocolate sweetness is just nice. Perfect with a hot cup of unsweetened earl grey tea!

Original Recipe - Serves 8-10

110g plain chocolate, broken into squares
200g self-raising flour
30g cocoa powder
a pinch of salt
175g unsalted butter, softened
60g light muscovado sugar
110g caster sugar
4 large eggs
3 tablespoons milk
1 teaspoon baking powder

Chocolate Fudge Cream:
200g plain chocolate, broken into pieces
175ml double cream
225g icing sugar

Preheat the oven to 180oC. Grease and base-line two 20cm cake tins. Melt the chocolate in a bowl over barely simmering water, and cool until tepid. Sift the flour with the cocoa and salt.

Beat the melted chocolate, flour mixture and all remaining cake ingredients together until smooth.

Divide the mixture between the two cake tins and smooth down lightly. Bake for 30 minutes until firm. Test with a skewer. Let them cool in the tins for 5 minutes, then turn out and finish cooling on a wire rack.

While the cake is baking, make the chocolate fudge cream. Melt the chocolate in a bowl. Put it back over the heat, and gradually beat in the cream. Once it is all in, take off the heat. Sift the icing sugar and beat into the chocolate and cream mixture, to get a smooth, fudgy blend.

Sandwich the two cakes together with one-third of the chocolate fudge cream. Spread the rest over the top and sides, roughing it up here and there with a fork.

Serve!

Saturday, June 28, 2008

PODS

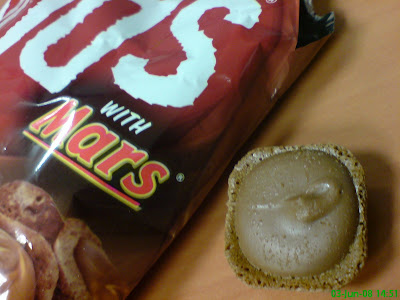
Feeling peckish? Have a craving for something sweet? Or do you just have a sweet tooth? Try this out.


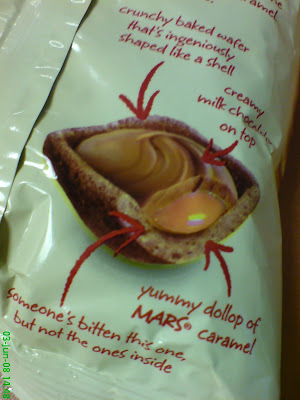
The first thing I love about PODS is their packaging. The way they describe it is so funny.


Fantastic afternoon snack to go with a cuppa tea. Crunchy biscuit on the outside, soft caramel on the inside, covered by a smooth chocolate top. Sweet...


It comes in Snickers and Twigs too. Even though I'm a great fan of the Snickers bar, PODs Mars is the best. :)

Tuesday, May 27, 2008

Homestyle Two-Bite Brownies

Are you a brownie fan? Or maybe just a chocolate lover?

Then you will love these. I found this selling at the NUS Coop store a few months ago this have since been pushed to my number one spot for BEST SNACK IN A BAG!


Like the name suggest, they are little brownies that can be finished off in two bites. For some packaged dessert, these brownies are surprisingly delicious!!!

They are soft, moist and oh so chocolately. I swear you can never stop at one! Goes superbly with a nice hot cuppa tea!

Chocolat N' Spice Muffins

My FAVOURITE place for a muffin is the undefeated Chocolat N' Spice. I've been patronising the store for years. My previous office is just next to it, so naturally we were frequent customers. But surprisingly, fanatics can be found even at the Clementi area, my current office.


We always buy in BOXFULS... there are so many different flavours! Orange, cheese, chocolate chip, banana, walnut, blueberry, etc.etc.


But my ultimate favourite is this beauty... Double Chocolate


So chocolately and more importantly, SO SOFT AND MOIST! See the chocolate chips inside!


Go try it - You won't regret it!

Chocolat N' Spice
Blk 1 Tanjong Pagar Road
#01-18 Tanjong Pagar Plaza
Singapore 082001
Tel: (65) 9276 2110

Opening hours
Mon to Fri: 8.30 am to 5 pm
Sat: 8.30 am to 3 pm
Closed: Sundays & public holidays

Wednesday, April 9, 2008

CoCo's Chocolate Chip Muffins

I was inspired to make some muffins after watching this pathetic woman trying to sell muffins in a variety show on channel 8. This woman hates muffins, and yet she opens a stall selling muffins! Not surprisingly, she sucked and so needs help from professionals to save her business.

ANYWAY, carry-on... let's not waste precious brain cells on imbeciles. Like I said, I was inspired to make some muffins. So I found this chocolate chip muffin recipe on Nigella.com. Usually I would not blog down recipes that didn't turn out well, so I guess this one made it. Haha..

Verdict: Very easy, very quick, very delicious. I complete everything (plus cleaning up) within an hour! Try it, it's fool-proof!

250g plain flour
2 teaspoons baking powder
Half-teaspoon bicarbonate soda
2 tablespoons best quality cocoa
175g caster sugar
150g chocolate chips (plus more for sprinkling later)
250ml milk
90ml vegetable oil
1 large egg
1 teaspoon real vanilla extract

1. Preheat the oven to 200C and fill a 12-bun muffin tray with paper cases.

2. Weigh out the dry ingredients into a large bowl. Pour all the liquid ingredients into a measuring jug (Why jug? Bowl also can lah~).

3. Mix both together (DO NOT over-do it. Just mix it up and leave it) – it will be a runny batter - then spoon into waiting muffin cases.

4. Sprinkle more chocolate chips on top then cook for 20 minutes or until the muffins are risen and springy.

Makes 12
SIMPLE RIGHT??!!

Result:
Related Posts Plugin for WordPress, Blogger...