Showing posts with label Home Made. Show all posts

Thursday, September 29, 2011

Mother-in-law's pa-mee (打面)

Everyday you learn something new...

My mother-in-law is heng hua dialect, so one night when we were over at her place for dinner, she cooked a huge pot of what they called, pa-mee (打面). I'm not sure how authentic is it, but it's delicious!


She bought this noodles from the market near her place, and I loved it as it doesn't have the alkaline taste like in those "yellow noodles".


So she gave me a packet and I tried to make a pot one evening. I'm not sure how, but I guess the main things would be the soup base, ingredients and the noodles.

Soup Base
Chicken breast, with bones
Ginger, one thumb size nob, smacked with a knife
Salt
Chicken powder

Boil for an hour, skimming off any excess oil or scum. Remove chicken and ginger.

Ingredients
Shitake mushrooms
Pork shoulder, sliced
Cai xing
Toufu fish cakes, sliced

Put everything into the soup base and boil until pork slices are cooked. Adjust flavour accordingly, it should be slightly more salty than usual to balance out the bland noodles.

Noodles
Put raw noodles in a big bowl, pour boiling water into it and swish it around for a few seconds before pouring away the water. Run under cold water for a few seconds and set aside.

When the soup is ready, add in the noodles and boil for not longer then a minute. Serve!

It's delicious, easy to make, and everybody in the family loved it. Definitely a recipe to keep!

Thursday, September 22, 2011

CoCo's Sausage and mushroom thin crust pizza

Was at my wit's end as usual, wondering what to cook for lunch when I remembered that I bought a packet of wholemeal wraps a few days ago.


So I decided to make a little home made thin crust pizza.


It's basically a pizza even people who can't cook can make.

  1. For the tomato sauce base, I spread on some pasta sauce from a jar. 
  2. Next I sprinkled on a generous heap of shredded cheese. Yumz~!
  3. Lastly, put on whatever ingredients you like, which was some sausages and mushrooms. 
  4. Bake the pizza in an oven at 200 degrees celcius for just 10-15mins, which is just enough to melt the cheese and make the crust crispy. Cut and serve!

Unfortunately, my 2 year old wasn't very enthusiastic with the pizza, but I really liked it! It really tasted like those restaurant style thin-crust pizza. I polished off the whole thing myself! Sigh, now I have to go make something else for the little princess... -_-

Friday, July 22, 2011

Miss CoCo's Cornflake Clusters

Jolie's playgroup was having a little party to celebrate Racial Harmony Day, so I thought I make something. The teacher wanted us to bring some traditional treats, but because I found out a little too late, I didn't have the time to prepare anything elaborate. If I knew earlier, I would have made some of my delicious pineapple tarts!

Anyway, no time, so I decided to make a modern CNY treat, cornflake clusters.


I've never made them before, so I did a little homework on the internet and improvised this recipe myself. Turned out a little too sweet, even for me! So I came out with this revised recipe.

60g Unsalted Butter
30g Caster sugar
60g Honey
220g Unsweetened Cereal
24g Raisins

  1. Bring the honey and butter to a boil over small fire. Let it boil for 3 -4 minutes while you prepare the rest.
  2. Pour the honey mixture into the cornflakes and raisins and mix well.
  3. Scoop into prepared mini cupcake cases. It's easier if you put the cases into the cupcake tins 1st, so that it will hold it's shape no matter how you shove the cornflakes in.
  4. Chill for several hours.


My original recipe was:

60g Unsalted Butter
60g Caster sugar
60g Honey
110g Banana Nut Crunch
24g Raisins

But like I said, it was way too sweet. Some pointers:
  • Banana Nut Crunch has a great mix of wholewheat cereal, granola, walnuts and dried banana, making it very nutritious. But it alone was already sweet, so it's not suitable for this recipe. Try something unsweetened to balance it out.
  • There was too much honey-sugar mixture versus the cereal. So the sugar coating was too thick, making it quite hard, like a candy. Adding more cornflakes would retain the crispy-ness of the cornflakes, held together by a little sweet syrup.


Other than that, it's a great party finger food, sweet and crispy. Perfect for kids party!

Friday, June 24, 2011

Purple Sweet Potato Bread

I came this book at the library and I know that I must have the book! So off I went to buy the book at Page One. The author is a Hong Kong lady and the book specialize in baking bread using a technique called 17 hour low temperature pre-fermented dough. The result is a more moist and chewy texture and a yeasty fragrance. It also last longer then your average home made bread!

天然面包香 by 獨角仙@藍色大門 (Natural Bread Made Easy by Kin @ Blue Gate)

Hubby asked me to make pandan raisin bread, but I really wanted to make this one instead. Look how pretty it is!!!


I have never eaten purple sweet potatoes before, I think the original was from Japan. I found a cheaper version at Cold Storage, which was from Vietnam, and only a few cents more then your average sweet potatoes.


Did you know that it is also a SUPER nutritious food? Check it out!

Anyway, on with the recipe. Another thing that I LOVE about the book, every recipe has a BAKER'S PERCENTAGE, which allows you to adjust the portion according to your liking. Awesome... So this recipe is adjusted to about half of the original portion.

Pre-Fermented Dough
Bread flour 210g
Warm water 120g
Instant yeast 6g
Salt 3g
Skim milk powder 6g

  1. Dissolve yeast in water.
  2. Add flour, salt, skim milk powder and knead until soft.
  3. Cover the dough in cling wrap. Refrigerate to let it prove for 17 hours.

Dough
Bread flour 90g
Skim milk powder 9g
Salt 3g
Sugar 36g
Warm water 75g
Instant yeast 3g
Unsalted butter 24g
Sweet potatoes 150g

  1. Cut the pre-fermented dough into small pieces.
  2. Steam the purple sweet potato with the skin on. Peel and mash it. Save some for filling.
  3. Knead all ingredients of dough together (except the butter). Add pre-fermented dough piece by piece. Knead after each addition until soft and smooth. Add butter. Knead until stretchable consistency.
  4. Put the dough into a big bowl. Cover with a cling wrap. Let it prove for about 25-30minutes.
  5. Divide the dough into eight small portions and round them. Set aside to rest for about 20mins.


  6. Flatten each piece of dough with your hands to drive the air out. Round them again. Press flat. Stuff them with mashed sweet potato. Round again. Place dough into greased chiffon mould. Cover with cling wrap.
  7. Let it prove for about 45mins or until the dough has risen to about 80 percent of the depth of the mould. Brush egg wash on top.


  8. Bake in preheated oven at 180 degree Celsius for about 30-35mins.


太好吃了!!! It's moist, chewy and oh so delicious! Definitely my BEST bread yet.


Will bring some to parents tomorrow, I'm sure they would be super impressed! Oh, I will also be submitting this post to Aspiring Bakers #8 - Bread Seduction. It's my very first submission, as I just missed last month's theme, which was CHOCOLATE. DUH right, I've got so many chocolate creations! Anyway, I'm quite pleased with this latest bread creation, so it's perfect! :)

Friday, June 3, 2011

内在美 Chocolate Mud Cupcakes


I made this for a friend's birthday. Kind of lazy to bake a cake, so I thought it would be better to bring chocolate cupcakes instead. This recipe was adapted from Baking Library. The original wasn't supposed to look so... ugly. I think either my oven was too hot or the cups were filled too full.

Anyway, it was the flavour that matters, thus the name, 内在美, which means "inner beauty". Haha... It's either that or my second choice, which was PMS chocolate mud cupcakes, because they were the perfect for dark and gloomy days when you have PMS...


Anyways, here are the ingredients:
30g cocoa powder
120ml boiling hot water
110g dark chocolate, melted and cooled (I used 63%)
110g unsalted butter, melted and cooled
165g brown sugar
100g ground almond
80g egg yolks (thats about 4-5 eggs, depending on size)
120g egg whites

  1. Line muffin tin with cupcake liners and preheat the oven at 175 degrees C.
  2. In a large mixing bowl, combine the hot water and the cocoa powder. Stir well to remove the lumps and ensure cocoa is well dissolved. Next, add in melted chocolate, melted butter, brown sugar and ground almonds. Stir to obtain an evenly mixed mixture.
  3. Beat in egg yolks on medium low speed, one at a time, ensuring each egg yolk is well combined before adding the next.
  4. In a separate clean metal bowl, beat egg whites on low speed until it turns foamy. Gradually increase the speed to medium high when the volume increases. Continue to beat the egg whites until they form medium-firm peaks. This is when the beaters are lifted from the egg whites, snowy egg white peaks are formed and they are slightly wobbly when the bowl is shaken.
  5. Fold one third of beaten egg whites gently into egg-yolk batter to lighten. Incorporate the remaining egg whites and fold gently to obtain a smooth, watery-foamy batter. Scrape sides and bottom of bowl to ensure even mixing.
  6. Spoon batter into cupcake liners until they are nearly filled. The batter will not rise much. Bake cupcakes at 175 degrees C for about 30 minutes or until an inserted toothpick comes out clean. Cupcakes will sink noticeably in the middle when cooled.

Since they were for a birthday, I made it more pretty by dusting some icing sugar on top.


Then I piled it up and made it a cupcake tower!


My friends loved it! It was awesome, and it was clean and easy to eat. Happy Birthday PL!

Friday, April 22, 2011

Braised cucumbers with shrimp and mushrooms


This is another one of those typical home cooked dishes that I would whip up on an average day. I know that some of my friends who are reading this blog are newly weds who would cook for their family, so this is a good and simple dish to try to go with rice.
  1. Slice cucumber length-wise into quarters and slice off the seeds. Slice into smaller pieces. Slice up brown mushrooms. De-shell prawns and make a slit on the back to remove the "poop-vein". Chop a small clove of garlic finely.
  2. In a medium-hot frying pan, fry up the mushrooms and cucumbers with the garlic. Add water until just barely covering the ingredients. Add 1 tablespoon of oyster sauce and 1/2 tablespoon of sugar and let it braise in low heat until the cucumber is soft. (about 5-10mins)
  3. Add prawns into the cucumbers and stir fry until the prawns are cooked.
  4. Stir in 1 tablespoon of Chinese cooking wine (optional) and add in cornstarch water* to thicken the sauce.
  5. Serve!


* Cornstarch water, or 勾芡 (gou qian), is to mix a small teaspoon of cornstarch with a little COLD/COOL water. This cornstarch water is added to a dish just before it's done to thicken the sauce and give the dish a shiny, glossy finish. It's heat that activates the thickening agent, so it's important that you use cool tap water to make the cornstarch water. Also, continue stirring the food while you add it into the frying pan, or you'll get a lump of jelly in your food. :)

Friday, February 18, 2011

Herb Butter Chicken


A roast chicken recipe with a difference! I saw this recipe on Jamie Oliver's show, so this is based on what I vaguely remember. All you need is the usual stuff like...

A whole chicken
Your choice of vegetables to be roasted together with the chicken.
Herb butter!


Herb butter is very easy to make. Using soften unsalted butter, (not melted, softened) add in herbs like thyme, rosemary and parsley. Add in salt and pepper, mix well, and you're ready to use it!

Use a spoon to create space between the skin and the flesh of the chicken before you stuff as much of the butter inside.


Rub the remaining butter onto the vegetables and put them under the chicken. This way, the juices would flow from the chicken onto the veges while it roast!


Roast the chicken in a preheated oven at 200 degrees C for 45mins. The skin would be crispy, the meat juicy and delicious, you will love me, you are welcome! :)

Saturday, January 29, 2011

Miss CoCo's Chocolate Buttercream Birthday Cake

I got this fabulous chocolate buttercream sponge cake from Baking Library and it was GREAT! Definitely a must-try for anyone who loves a good chocolate cake with rich chocolate frosting and yet, not too sweet or heavy.


As it was my very 1st attempt in making an actual birthday cake, and it was for my darling baby girl's birthday party, I wanted to give the recipe a try 1st. So I made one earlier half the size.

I even tried doing some simple piping with the extra buttercream. Haha...


I noticed that if it's too small, the sponge cake have trouble holding up at the sides while cooling. But I just wanted to try out the taste, and it was definitely a PASS for me!

So this is the full size portion...

Chocolate Sponge Cake :
70g egg yolks, room temperature
50g caster sugar
4 tbs vegetable oil
4 tbs water
80g cake flour
15g cocoa powder
1/2 tsp baking powder
145g egg whites, room temperature
50g caster sugar

Swiss Meringue Chocolate Buttercream: (about 840g)
195g egg whites
220g caster sugar
385g unsalted butter, softened but still cold
100g cocoa powder (I used Hershey's)

Making the Chocolate Sponge Cake:
  1. Preheat oven to 160 degrees C.
  2. Whisk sifted flour, sifted cocoa powder and sifted baking powder in a large bowl to combine.
  3. Place egg yolks, 50g caster sugar, oil and water in a large bowl. Mix well with a wire whisk untill the mixture is evenly mixed. Add the flour mixture in and whisk to obtain a smooth and thick chocolatey batter.
  4. Next, whisk egg whites on low speed. Increase speed slowly to medium-high and beat untill egg whites are at soft peaks. Add 50g of sugar gradually and beat untill egg whites are just stiff and still moist. This is when the beaters are lifted, the egg whites will form peaks that are upright and not drooping slightly. Egg whites will resemble whipped cream.The entire bowl of whites will not drop out when the bowl is overturned. Do not beat until the egg whites are dry and clumpy.
  5. Fold one third of beaten egg whites into egg yolk batter gently to lighten and combine. Fold in the rest of the beaten whites to combine. Final batter should be foamy and uniform in colour with no streaks of egg white present.
  6. Pour batter into 2 greased and lined 8 x 3 inch round pans and bake at 160 degrees C for 25 -35 minutes. Test doneness using a skewer or toothpick. The highest part of the cake should rise up to 4/5 or nearly the full height of the tin. When the cake is done, the inserted skewer will come out clean.
  7. Leave the cake to cool in the tin for a short while. Cake will shrink from edges on cooling. (happens everything, it is normal) When the cake is no longer shrinking, unmould from pan, remove parchment/baking paper and turn the cake out to cool.

Preparing the Swiss Meringue Chocolate Buttercream:

  1. Place 195 egg whites and 220g granulated sugar in a heatproof bowl. Sit the heatproof bowl on a saucepan filled with water. The base of the bowl should not be in contact with the water. This is known as a double boiler. Bring the water in the saucepan to a slight simmer. Use a balloon whisk and stir the egg whites and sugar constantly until the sugar has fully dissolved and the mixture is warm to the touch (test by inserting your finger).
  2. Remove the heatproof bowl and beat the warm egg white mixture on medium high speed to obtain stiff peaks using an electric beater. (It takes a longer time when sugar is added.) At stiff peaks, the beaten egg whites will not budge when bowl is overturned. When the beaters are lifted from the beaten egg whites, the surface of the egg whites should form stiff upright peaks (not drooping peaks). The beaten egg whites should be cool to the touch (room temperature), not warm like when it was removed from the saucepan.
  3. Beat in 385g butter into the beaten egg whites in 3 batches, ensuring each batch is incorporated before adding the next. The egg whites will deflate furiously when butter is added. Continue beating until the mixture is creamy and fluffy (Initially when the butter is added, the mixture may become watery. As more butter is added, the buttercream thickens up).
  4. Lastly, sift in 100g cocoa powder and continue beating to obtain a smooth chocolate buttercream.


Assembly:
  • I just sandwich some buttercream between the 2 sponge cakes and frost the whole cake with buttercream.
  • My hubby suggested adding some nuts to the cake, so I added some crushed hazelnuts to the side. The nuts really complement the chocolate very well!
  • I wanted to add some colour to the cake, so I topped it with some sweet Korean strawberries.
  • I wanted it to be more kiddy, so the train candle holder I found at Phoon Huat was perfect. :)


I was so busy bringing out the cake that I forgot to take a good photo of my greatest creation! Too bad, I just too 2 pictures hastily and did some cropping from the group photos. :P


So happy and proud... :))

Monday, January 10, 2011

Deep Fried Stuffed Tau Pok


Got this recipe from an old cookbook. In the original recipe, in the fish paste, they add:
chopped water chestnuts
diced spring onions
chicken stock granules
dash of sugar, sesame oil and pepper


Thankfully, I found some raw fish paste at a local supermarket that was already seasoned. Besides, I didn't want to buy a whole bag of water chestnuts, so I didn't add that either.

So, very simple. Just cut a tau pok into half and flip it inside out.


Using a teaspoon, stuff in the fillings.


Heat up oil for deep-frying, put in stuffed tau pok and deep-fry till until golden brown and crispy. Dish and drain, serve hot with chilli sauce. YUM YUM!

Friday, December 24, 2010

CoCo's Roasted Rack of Lamb


This dish has to be my crowning glory! I love rack of lamb, so this Christmas Eve I thought we cook something special and hubby suggested rack of lamb. I have never cooked it before, but how hard could it be right?

Seriously this was another one those dishes that seemed difficult, but it's NOT! OK the ingredients were a little expensive, this rack of lamb, which the butcher had already prepared by cutting away all the meat from the top of the bones, cost around S$38.00. But I guess for a special occasion, why not?

So anyway, very simple. I learnt all of these from daily tutelage from chefs around the world, gathered inside my television set. :)

1. Make sure the meat is at room temperature, take it out of the fridge early. Preheat oven to 200°C. Trim off some excess fat surrounding the meat. (Keep the fat*) Wrap the bones with tin foil to prevent burning.
2. Just before roasting, season the meat with a pinch of chopped sage, thyme, freshly ground pepper, salt and extra virgin olive oil.
3. Sear the meat on a hot frying pan to give the meat a nice brown colour.
4. Place the meat into the oven and lower the temperature to 180°C. Roast for 25 minutes.
5. Up the temperature to 200°C and roast for another 10 minutes. Take out the meat and cover it up with aluminium foil for at least 10 minutes before slicing it.

Serve with brown sauce and salad.

Brown sauce:
-Pour away some of the fat from the baking tray.
-Place the baking tray (only if your tray is stove top friendly - if not, scrape everything onto a frying pan) on top of the stove and add 2 tablespoon of flour.
-When everything is lumped up, add in some soup stock or water until gravy is formed and keep stirring until smooth. Flavour if necessary.

*FAT*
Cut the fat into small cubes and cook in frying pan with some cooking oil in very low heat. Slowly, the animal fat would be rendered, leaving behind a super flavourful oil and crazy crispy and delicious crackling.


As the fat has been released, the crackling is not too oily and very delicious. Kind of like the chinese 猪油渣. The remaining oil can be used to make super yummy roast potatoes. Just add boiled potatoes onto the cooled oil and roast them in the oven at high heat, 200°C, for about 20 minutes, turning occasionally. The result is something you can match at Macdonald's! Serious!

Saturday, December 11, 2010

CoCo's Glutinous Rice


The recipe sort of belongs to my Mummy I guess. She just verbally told me the basic techniques and rest was up to me. This was my very 1st try and I was surprised that it turned out quite well! So I guess it's not as difficult as many think it is.

Glutinous Rice - Best thing is, supermarkets now sell them in small packets rather than in huge 5kg packs. Which was just enough to fill a Tupperware to the brim. Rinse through with water a few times before soaking them in water overnight.

Mushrooms - I like those dried mushrooms as their flavour is much richer. Depending on personal liking, soak a few in lukewarm water overnight as well.

Dried Shrimps - key essential flavour. Soak a small handful in water for a few minutes.

Meat - some like pork, others like chicken. Here I'm using chicken breast meat, but you don't need much as it is only a supporting actor in this blockbuster movie. Slice them thinly.

Garlic - Mince 1 clove very finely

On the day of cooking, drain away the water from the glutinous rice, leaving a little behind. Add in 2 tablespoons of dark soya sauce, a few shakes of sesame oil, 1 teaspoon of chicken powder and 1 tablespoon of cooking oil. Mix well, pour the rice onto a plate and steam it.

The shortcut way to making easy fluffy glutinous rice is by using a pressure cooker. If using pressure cooker, steam for 30mins. If using a regular steaming method, steam for 45min to 1 hour or until rice is just cooked, slightly translucent.

While the rice is steaming, heat up a little oil. Stir fry the chicken, dried shrimps, mushrooms and garlic with some oyster sauce, a teaspoon of chicken powder or salt, pepper and finally water or chicken stock to just cover all the ingredients. Remember that the rice is quite bland, so don't worry that it would be too salty.

When the rice is ready, just pour the rice into the mix and keep tossing until the rice has loosen and mixed well with all the ingredients. Taste to check the seasoning.

For an extra burst of flavour, you can make your own fried shallots and some shallot oil just before serving. To store, just make sure it's cooled before stuffing it into a Tupperware and keeping it in a fridge. The next morning, just scoop out, steam it for another 20mins and a sumptuous breakfast is ready!

Thursday, December 9, 2010

CoCo's Chicken Country Pie


This dish was inspired by the famous Chicken Pie from The Coffee Club cafe, which I absolutely love! I made this once many years ago and wrote it down into my recipe notebook. I was reading my notebook, looking for inspirations for dinner when I came across this. So I improved on my previous recipe and am happy to say it is now more yummy and nutritious than before!

To make 2 giant pies,

Filling:
1 stalk of celery, chopped finely
1 onion, chopped finely
1 stick of carrots (half minced, half diced)
1 clove of garlic, either grated or chopped finely
1 de-boned chicken thigh, diced
chicken stock
1 small pinch of Thyme, Rosemary and 1 Bay leaf
a small knob of butter
2 tablespoons of flour

Pie covering on top:
Store bought mixed cheese
Potatoes, carrots and pumpkin

For the filling:

1. cook celery, onion, minced carrots and garlic in low heat with a small pinch of salt. The aim is to soften the vegetables, which would remove the yucky celery taste that many people hate, including me, and give the dish this lovely flavour.

2. Add in the chicken pieces, carrots, spices and cover the meat with chicken stock. Simmer for 5-10mins.

3. In a separate pan, melt butter and add flour onto melted butter. Stir till the mixture is dough-like. Add the watery juices from the chicken to make a thick gravy. (If too dry, add warm water) Mix into the chicken and vegetables, season to taste and you have your filling!

For the top:
The original was just instant mashed potatoes, but I wanted to make it more nutritious, so I boiled potatoes, carrots and pumpkin for 15-20mins, until it's soft. Then I mash them all up, added some butter, salt and pepper it's done!

To finish, dish the chicken gravy into oven proof dishes, spread the mashed vegetables on top, and just before serving, sprinkle cheese generously on top and bake the pies in a 200°C for 10mins, or until the cheese is golden brown and bubbly!


World best...

Tuesday, December 7, 2010

CoCo's 爱心菜心 (Love Love Stir Fry Caixin)


This was just a very simple stir fry vegetable dish. But I was just inspired to do a little "art and craft" and have fun with everyday cooking! I guess sometimes you don't need to take things too seriously!

1. Stir fry sliced shitake mushrooms, carrots and garlic with a little oil till fragrant.

2. Add in the caixin, season with chicken powder and a little water.

3. Stir in a little cornstarch water to thicken up the sauce and give the dish a nice shine.

Wednesday, December 1, 2010

CoCo's Stir Fry Leeks with Sweet Peas and Prawns


Hubby loves leeks, so this was not the 1st time cooking this. But it was the 1st time I added other vegetables into the dish. I just thought that adding sweet peas would add another dimension of texture to the dish and I loved it. The soft and fibrous leeks with the sweet and crunchy sweet peas. Delicious!

1. I stir fry the fresh shitake mushrooms with the prawns. I want the original sweetness of the prawns intact, so I didn't marinate it.

2. Add in the sliced leeks that has been sliced on the bias, which means to cut diagonally. I don't know why, but this is how my Mom taught me. I guess this gives the vegetable more surface area and cooks faster and more evenly, as leeks are like onions, with many layers.

3. Mix half a teaspoon of chicken powder, 1 tablespoon of oyster sauce, 1 teaspoon of sugar, a little hua tiao wine and a little water. Pour in the sauce and the sweet peas and let it simmer for only a minute or two before dishing it up.

Don't let it cook too long or risk losing the sweet crunchy lovely-ness of the peas! Enjoy~!

Thursday, September 30, 2010

CoCo's Teochew Steam Pomfret


NTUC Fairprice supermarket was selling some really beautiful, fat, silver pomfret the other day, how can I resist? I have never made this dish before, but have eaten plenty. So for this very first attempt, it's all based on what I remember and a little advise from my Mom. I must say, it was delicious!!!

My version of this classic dish is slightly different. Instead of salted vegetables, I use Sichuan pickled vegetables. Also, I didn't add tofu because I just don't want to buy a whole block of tofu. Lastly, because this was meant to be a one dish meal, I added some broccoli.

So here are the ingredients:

Sliver Pomfret
sliced mushrooms
sliced Sichuan vegetables (soak them for about 10mins)
tomatoes, quartered
Ginger, 4pcs thinly sliced
Lean pork, a few slices
Broccoli, cut into small pieces

So, so simple:
1. Made cuts on both sides of the fish. This makes the fish cook more thoroughly, and easier to serve.
2. In a small pot, boil the mushrooms, sichuan vegetables, ginger slices, pork in about 1/4 quarter cup of water. Add a pinch of MSG and half teaspoon of sugar and boil for just about 5 minutes.
3. Place the tomatoes on the fish and pour the soup stock and all the ingredients onto the fish.
4. Steam the fish. About 20 minutes for a 300g+ fish.
5. At the last 5 minutes, add in the broccoli.
6. Serve immediately!

Monday, September 27, 2010

CoCo's Sweet Barley Drink


Here's a super nutritious drink that only needs TWO simple steps. It would be a crime not to pamper your loved ones and yourself to this drink!

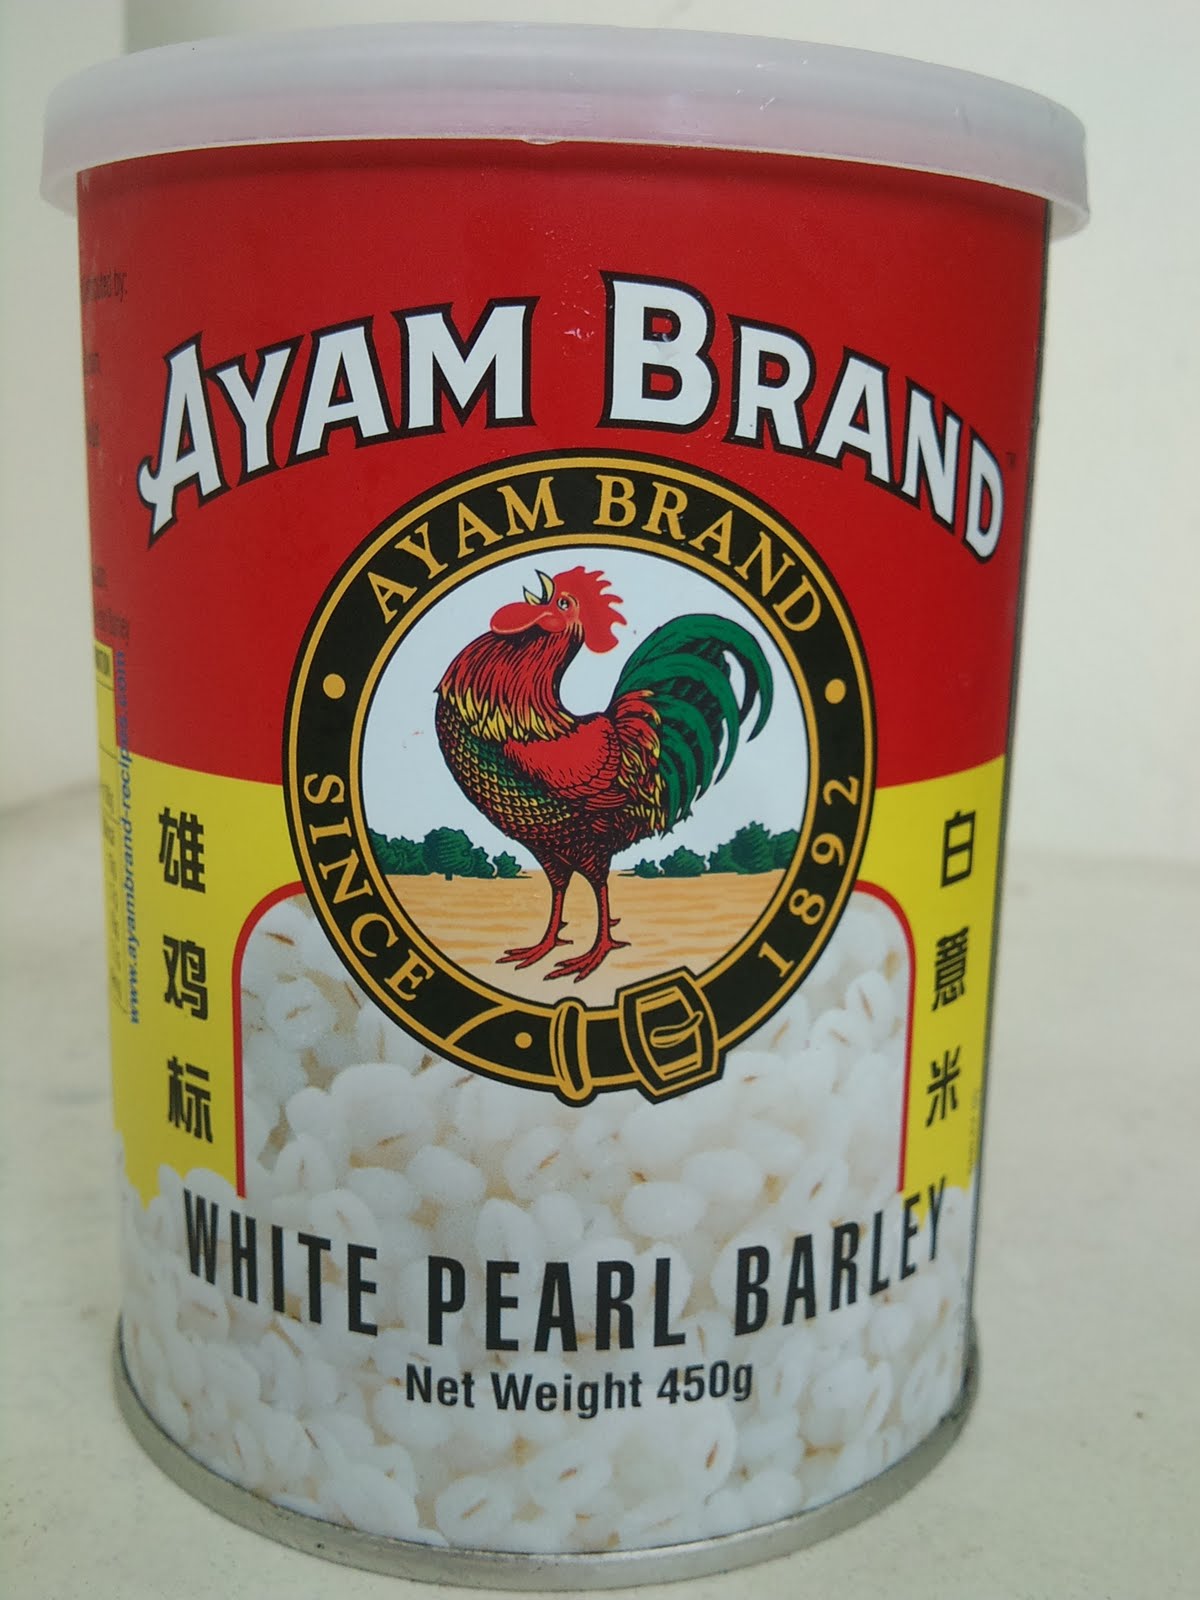
1. Boil a big handful of barley (I recommend Ayam brand) with 2 pandan leaves in 2 big soup bowls of water.

2. After 1 hour (30 minutes for pressure cookers), add rock sugar for taste. How much to add depends on personal taste.

I like to put the cooled drink in bottles and put it into the fridge. Nothing like a chilled barley drink on a hot day!

TIP: My Mom taught me this. Usually if you buy Pandan leaves, it comes in a HUGE bunch. Wash it, trim off the brown parts and tie it up in bundles. You can then freeze these bundles and they can last so much more longer! When you need them, just take them out of the freezer and into the pot! Brilliant!

CoCo's Lotus Root & Pork Rib Soup

Here's another delicious Cantonese style soup that's super easy to make. All you need is a few ingredients.

Lotus roots:
Choose a nice fat one, two sections would be enough for a pot of soup to serve 2-3 persons. The ones in the market is covered in mud, but supermarkets sell them nice and clean. I remove the skin, but it's optional. Just chop off the ends and slice them thinly.


Essential Flavours:
These are your very basic stuff you add into almost EVERY soup. Dried dates, wolfberries and some form of dried seafood. It can be dried octopus, dried mussels, or dried scallops. These would give your soup a nice flavour, or like the chinese say, 很鲜, so you don't need to add MSG.


Of course, it's a pork rib soup, so don't forget your pork rib! OK, now for the cooking process. Are you ready? Here's what you do...

Put everything into a pot with a teaspoon of salt, add water and boil in high heat. Once it's boiled, lower the heat and simmer for 2 hours. 1 hour for pressure cookers. :)


Measure your water according to how much soup you want to end up with. If you want to make 1 big soup bowl of soup, add one big bowl, plus about 1/3 more that would be boiled off during cooking.

Tuesday, June 22, 2010

CoCo Mama's Steamed Eggs with meat


A simple home cooked dish that I grew up eating. We would mix the eggs with the rice and woof it all down!

For a small, serving for 2, you will need:

Minced meat (chop yourself for more texture, or buy ready made from supermarket for convenience)
Seasoning - soya sauce, sesame oil, chicken powder, pinch of salt (or fish sauce if available)
1 large egg
2 egg's worth of water (this is the golden ratio! 1 egg - 2 water. Use shell to measure water)
oil

1. Beat eggs with water
2. Mix meat with seasonings
3. Mix egg mixture with minced meat
4. Add a few drops of oil onto the egg mixture just before steaming.
5. Steam for 10-15mins in low heat until egg is firm around the edge but still slightly wobbly in the middle when you gently shake the plate.

NOTE! Don't cover the wok completely when egg is steaming. In fact, you can even open up to check occasionally.

Thursday, March 25, 2010

CoCo's No Knead Bread


No Knead Bread
By: Michael Smith

Ingredients:

3 cups all-purpose or bread flour
1/4 teaspoon of dry yeast
1 1/4 teaspoons of salt
1 5/8 cups of warm water

Method:
Whisk the dry ingredients together thoroughly.

Add the water and stir until a wet dough forms. Continue stirring until the dough incorporates all the loose flour in the bowl, about 60 seconds in total.

Cover the bowl with a towel (I use cling wrap) and rest in a warm place for 12 to 18 hours.


It will double in size, bubble and long gluten strands will form.


Lightly flour your hands and the work surface then remove the dough from the bowl. Quickly form it into a ball. (Be warned - it's super sticky, wet and difficult to handle)

Thoroughly flour a cotton towel and rest the dough on it. Cover it with another floured cotton towel. You may also rest the dough on a non-stick ‘Silpat’ mat and cover it with just one towel. (I placed it on a non-stick baking tray) Rest the dough a second time. In 2 to 3 hours it will rise again and double in size once more.

I didn't read the instructions properly and didn't put the dough on a towel. So I had a little sticky situation when trying to get it out of the pan and into the pot. :P


A half an hour or so before the dough is ready preheat your oven to 230°C with a heavy covered pot in it. You may use cast-iron, steel, enamel or ceramic.

When the dough has fully risen slide your hand under the towel and quickly invert the delicate dough into the hot pot. Shake the pot a bit to settle it then place the lid on the pot and start baking.

Bake for 30 minutes with the lid then remove it and bake for 15 minutes more and... Presto! Home made bread...


It won't stick to the pot, so just pop it out.


Perfect with butter...


Check out the original recipe for a bigger portion and a healthier version!

Update - I'm submitting this post to Aspiring Bakers #8 - Bread Seduction. I guess this creation holds some sentimental value for me as it was my VERY 1st bread creation. Besides, this is a very unique recipe!
Related Posts Plugin for WordPress, Blogger...